Thursday, May 22, 2014

Checkmate!

Week #4 of Season #4 of Project Sewn is upon us, which means Signature Style Week.  Last time around I was trying to figure out my signature style.  As I sew along this season I am including all the elements they suggest for the challenge: Showcase your style, your strengths, and your personal sewing preferences.

For the style element I chose the super bold chessboard print.  Black and white are great colors for me and I love to wear them because then I can accessorize with pretty much any color under the sun.  Or I can keep to black and white for a more chic look.  The chessboard pattern can be pretty overbearing but I actually feel a boost of confidence wearing it.  The fabric is the Racing Flag Check (I prefer to say chessboard) knit from Girl Charlee.  I wouldn't normally have chosen the shirt pattern I used because it was so plain.  But I couldn't get it off my mind.  When I saw the fabric I instantly thought of the pattern because the funnel neck gives it such a mod feel.  It felt like it was meant to be.

The sewing strengths I am showcasing are invisible zippers and stripe matching for the top, as well as determination for the pants.  I can honestly say I've gotten pretty good at those things.  The top has an invisible zipper at the neckline and, obviously, more squares and lines than you would want to count.  It's fussy that way.  The pants, on the other hand, are simply glad I haven't thrown them into the "donate" pile before now.  Those pants have been problematic since the very beginning and never quite fit as well as I'd originally hoped.  They pulled in a bit too much at the waist.  I couldn't give up on the idea of the pants so I made them work.
Those are pieced raglan sleeves.  Can you find the seam down the center of my arm?
Finally, my personal sewing preferences.  I love to try new and difficult things.  I think I hate new and difficult things while I'm in the process.  As soon as I'm done, though, I always feel really good about having conquered a new skill.  The new thing for the top was using a downloadable pattern from BurdaStyle.  For the pants the new procedure was turning regular pants into maternity pants.
The end of the invisible zipper.  The white you see is fabric print , not thread or a hole.
The pattern for the top (BurdaStyle 02/2012 #127) was not difficult to construct.  I omitted the pockets, figuring they'd be more useful in the dress than in a top.  The problem was in getting the check pattern to match.  Because the design is printed rather than woven in, the checks don't necessarily match up when the grain does.  I decided to take a chance and make the fabric do weird things during layout, hoping against hope that it wouldn't end up a big waste of material.  Lucky for me, it worked out great.  Even after I gave it 24 hours to hang out I still didn't need to do anything to even up the hem.  Sweet!  What I had really wanted to do was make a perfect pattern match in the front for an uninterrupted check pattern.  The center front seam is curved to make room for a growing belly, so a pattern match on the front was not possible.  But on the shoulder seam of the raglan sleeves?  Well...that was pretty good, if I say so myself.
Shown without the ribbon tie, for days I don't want anything around my waist.  It also gives a good view of the line down the center front.
Now on to the pants.  I really wanted to love them after I made them last year.  They just weren't quite comfortable enough for me to ever wear.  I was determined to make them work.  Well, if I wanted comfy pants then there isn't anything much more comfortable than maternity pants.  The Secret Fit belly from Motherhood Maternity is my very favorite.  I have a pair of jeans with that belly that is no longer wearable. The back seam of pants tend to blow out when they are traded back and forth between two people and at least five (possibly six) pregnancies.  Now my purple pants have a navy waist on them and I couldn't be happier about it.  I love loving to wear things I've made, particularly when I spent so much time trying to get them to work in the first place.  If I only get to wear them for the next five months, then so be it.
Marking the pants for their new waistline...and apparently not wearing my wedding ring.
Using this Burda pattern has helped me get over the distaste I felt for them after the blue shorts disaster.  I will be adding ribbon gussets to the shorts to make them fit properly.  I can't give up on them yet, but I need a little break from them.  Ever have a project like that?

The shirt fit quite well, though the fact that it is a maternity top may have had something to do with it.  I'm not in love with having to print and assemble the pattern before cutting it out and then tracing the pieces to add seam allowances, but that's part of a PDF pattern.  I generally stick to paper patterns and just cut once.
And there you have this season's signature style.  It's bold, it features procedures I'm good at, and it gave me a new challenge.  I feel comfortable and confident in it, which was kind of a surprise.  The shirt was in my bag as I went to a doctor appointment today.  I was too nervous to actually wear it.  I put the shirt on to take pictures at my mom's work and then just left it on before I went to the store because I didn't feel like changing.  Before I went in the store I was nervous about the top's boldness again.  Once I was around people it only took half a second before I felt better.  Maybe better isn't a strong enough word.  I felt good enough that I started to...strut.  Just a little bit.  That means this shirt's a winner in my book.  Checkmate!

Don't forget to vote for your favorite project here!

Monday, May 19, 2014

Roman Goddess of Sewing

This week's challenge for Project Sewn had me almost giddy.  The project for this challenge, Going Global, was so easy to choose.  If there's ever a time when I need to choose something international it will always be Italy.  Always.  I served there as a missionary for a year and a half.  In that time I very quickly came to love the people, the culture, the language, the food, everything.
Do I look statuesque?
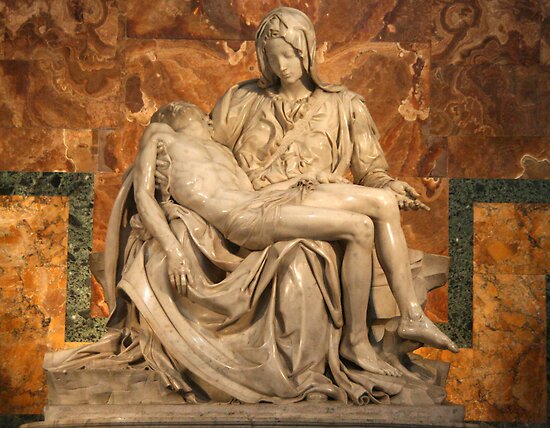
What I was most surprised to find a love for (other than tomatoes, which I previously despised) was art.  I've never been as much of an art buff as I wish I were, but the sculptures in particular were nothing short of inspiring.  And plentiful.  My favorite sculptures are those that show flowing, draping folds of fabric.  I am amazed that something can start as a piece of stone and be formed into something that conveys delicacy and softness.  I see the creation parallels with sewing, so maybe that's why I love them both so much.  But I digress...as usual.
I could look at this for hours, especially because it would mean I'm back in Rome.
I chose to make a top and pants that I would love to see on a sculpture.  The pattern for the top is Burda 7164 and I ended up with two different bottoms.  The shorts are Burda 7165 and the pants are Vogue 8859.  A quick rundown on the shorts is that the pattern is bad.  Bad, bad, bad, bad, BAD!  The body measurements as compared to the finished garment measurements are ridiculously bad.  For example, I added FOUR INCHES to EACH LEG to achieve the fit you see.
Side seams let out all the way still left hip divets.  And what's the point of the free-flapping waistband?  Also, my fingernails aren't as long as the nail wraps make them look, but the shorts didn't cause that problem.
Rather than continuing to whine I will just say that this pattern is dead to me.  Let us never speak of it again. The pants, on the other hand, were fast and easy to sew up.  I am extremely short-waisted, so keeping the original waist line on a pair of pants automatically makes them mid-belly maternity pants for me.  I also thought the detail at the knee was fun.
Knee and inset details
Now for the top.  I love it.  A lot. Sewing it up was quick and pretty straight forward.  I ignored the instructions about attaching the inset because I preferred to have an enclosed seam.  This top is so different from all the other maternity tops and I really like that.  The folds and drape made by gathering on to the original inset make the soft lines I would so love to see on a sculpture.  Instead I get to see it on me and that also makes me happy.
17 week belly shot
The fabric for the top is a tango red jet set from JoAnn (looks like it's on sale today!) that I bought who knows how long ago with plans for a different, though equally out-of-the-ordinary top.  Whenever I finish a project with jet set I wonder why I bother to sew with any other fabric.  It's smooth and cool for the summer.  The fabric is thin but opaque.  It does tend to run so it's a knit that MUST have seam finishes.  But it's so cool and comfy.  I deviated from the pattern by shortening the tunic length about three inches and leaving the inset plain.  The pattern calls for a contrast fabric or for batting and quilting lines on the inset piece.  I don't relish the idea of having a quilt over the top of my little internal heater during a summer pregnancy, so I just kept it plain with a single row of edgestitching to keep the seam allowances in place.
How about now?  Am I statuesque enough?  :)
I had my dad take a few pictures for me so I could try to pose like a statue. I may look like I'm in pain but really I'm just wondering what's going to happen to the burned-out little raisins I used to call my eyeballs.  It was extremely bright and windy.  I probably should have stood in the shade so the shadows created by the folds from the gathering could really show up.  Lastly, here's a photographic throwback to when I was actually in Italy. This was ten and a half years ago during my last week in Rome as I was thoroughly enjoying a gelato, most likely stracciatella.
This picture shows two Italians, two Americans, and one Swiss.  Can you guess who's who?
O Italia, come mi manchi!  Ci rivedremo un giorno.

Sunday, May 11, 2014

Electric Flamingo or, The Mother's Day Dress

I made a Mother's Day dress this year because I didn't make one for Easter.  Well, that and because Project Sewn is happening.  Floral Frenzy is the name of the game this week.  Florals really are on trend right now but there's a bit of a problem.  I don't like most of them.  I have no idea what's wrong with me.  I used to love florals!  When I went to the fabric store I found lots of stuff like this:

These fabrics speak to me.  Unfortunately they say, "No, no, no, no, no!  Run!  Run far away!"  If I'm truthful (and I always am), I have to admit that some of those are quite pretty but I would hate them once they were on my body. They would look great on other people, but on me?  Not so much.  Some of the others are just straight up wretched.  That one up there that you like...that's the one I like, too. *wink, wink* I'm more drawn to florals like this:

I had pictures chosen for a collage to go here but for some reason I couldn't make it work, so here's my favorite.
Sadly, the fabric stores had nothing I liked well enough to spend money on.  I wandered the store and ended up with the laces.  My eye was immediately drawn to the neon orange lace.  Yeah...neon orange.  Something about its punch-you-in-the-face brightness attracted me.  Because it's less obnoxious than the prints. Obviously.

I call this dress "The Electric Flamingo"
I scoured that store and three other fabric stores to find a match to go under the lace.  No dice. Instead I decided to use some hot coral ponte de roma fabric from Girl Charlee for which I didn't have a specific project in mind.  Because the fabric choice is so...(can't think of an appropriate word; I blame pregnesia) I knew the pattern needed to be a bit more demure.  I had my old and waaaaaaaay out of print Vogue pattern to help with that.  Another reason I chose it was because of the flat front on the skirt.
Printed in 2003.  Old enough to be out of print but not "vintage" yet.
The description says "very loose fitting" and they weren't kidding.  I ended up taking in about six inches from the bodice and could probably have lost another three without feeling confined.  After taking in the bodice I decided to keep the fullness in the skirt, just in case.  I made a single inverted pleat at the center front to give the skirt fullness a place to go.  So much for the flat front I thought I wanted.  Actually, I prefer it with the pleat now.  I also changed the sleeves a little and the jury is still out on how I feel about them.  Because I don't like the look of knee length skirts on me, I lengthened the skirt quite a bit.  Once it as on my body it looked more mother-of-the-bride than it did springy and fresh.  To remedy that little problem I changed the neckline so you can actually see my collarbone.


It is the details that really make a project special.  Translation: I searched even more stores to find a matching trim lace or ribbon or SOMETHING to add to the dress.  I really wanted a trim lace to finish the skirt and sleeve hems.  The lace is very light so it doesn't have the weight I want to just trim it along the design line.  Let me tell you, there is nothing out there that matches.  Four fabric stores later I ended up with a coordinating satin ribbon from Hobby Lobby and a pretty little flower trim from Joann. After simply stitching them together down the center I had my sash.  I opted to make thread carriers so I could keep the trim as a true sash, separate from the rest of the dress.  That way I can let the dress out easily without worrying about how to fit the trim back on.  Hopefully the belly size and weight gain will stay under control and that will be unnecessary.
The standard bump shot
So there's my floral(ish) Mother's Day dress.  There are so many flowers on that thing that I was my own corsage.  I wore it proudly all day long, both at church and at my in-laws house.  We took all the pictures there.  My house isn't nearly so pretty.  It'll be great for the rest of the pregnancy and, when that's done, I'll turn it into a skirt so I can continue to wear it.
More flamingo-ing
And now, for your viewing pleasure, I include a video of my girls.  I dropped some 5,000 lb hints to my husband that I wanted an early ultrasound.  There has been good reason to believe this is a twin pregnancy and not knowing has been driving me nuts!  My husband caught on and we paid the $45 to get a "gender check" ultrasound from a local clinic.  I'm far enough along that they can check the gender, but I just wanted to find out if there's one baby or two.  The video below shows the reaction of the girls as I tell them about the results.  Those sweet littles of mine don't hold their feelings back.  For the record, when I ask Q-ball anything about a baby coming to our house he just says, "No."  Here's to hoping the video actually works; Blogger is giving me problems...

Saturday, May 3, 2014

Leading Lady: Wendy Cooper

Hooray for week 1 of this season of Project Sewn!  I had a lot of fun sewing along with the last season but almost decided I was going to skip doing it this time around.  I simply wasn't sure I wanted to invest my time, money, and effort into sewing things that will only be worn for a short period of time.  Yes, I'm expecting again.  Woohoo!  It's always a blessing but it feels a little extra special after my miscarriage last October. With all my past pregnancies I had no problem wanting to sew something fabulous to wear.  This time is different because it will be the last and I already have plenty of maternity stuff. Tangent: I'm really not kidding when I say I have plenty.  My maternity stuff is prettier than my regular clothes and I have more of it.  Much more.  Once this pregnancy is over I will be forever done with my maternity wardrobe, thus my reluctance to add to it too much.  However, I love me a good challenge and sewing maternity clothes is a different animal than sewing regular clothes.  Plus, I already had patterns I'd never used.
This week's theme is Leading Lady.  I decided to choose a pregnant leading lady for clothing inspiration and assumed that would make it easier.  Oddly enough, the only person I could think of was Tess Ocean from Ocean's 12, who was impersonating a pregnant Julia Roberts.  "Protect your fake baby!"  I guess I haven't seen as many movies with pregnant ladies as I thought.  A friend directed me to the movie What to Expect When You're Expecting.  Bingo!  Aside from a lot of choice in that movie, one of the characters stood out with a style I love.  Even better, it turns out that I love the movie.  I've seen it at least 3 or 4 times in the past couple of weeks.  Hooray for Netflix!
That look of I'm-so-uncomfortable-please-shut-up-before-I-smack-you-no-actually-come-just-a-little-closer-so-I-don't-strain-myself is pretty spot on.
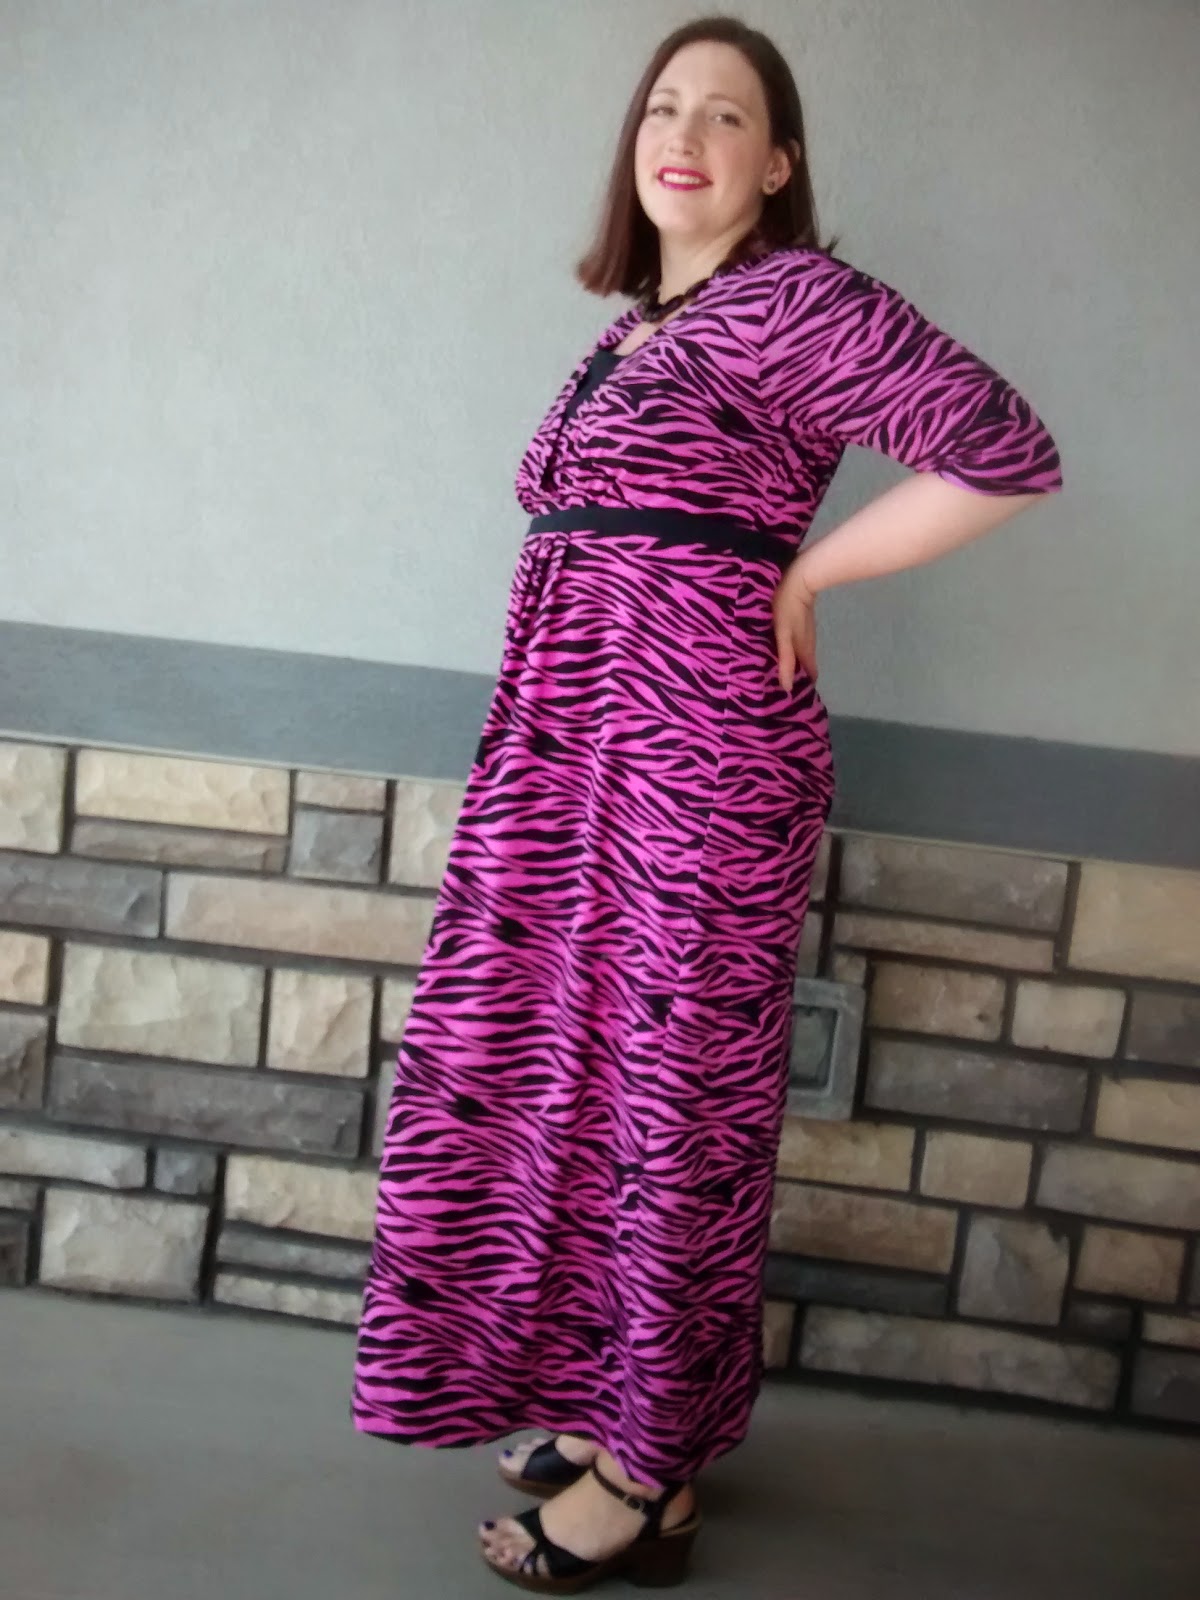
Wendy Cooper is my leading lady.  I can relate to all five of the women in the movie in one way or another, but Wendy is my style soul sister.  She wears bold, high-contrast colors in feminine styles.  And very preppy.  Perfect.  My own selection in what to make, however, is not one that Wendy would have worn.  It has the bold pink but I don't think she'd have gone for the print.  She has mostly solids and florals.  I chose this dress because it shows how Wendy changes during the movie.  She goes from completely put together and in control to admitting defeat and giving up.  She puts on a brave face and pretends it's all sunshine and roses until it's just too much and she gets completely honest.  I go from "I love being pregnant" to "I. Can't. Breathe." to "I just stood up!  Why the heck do I need to pee again?!?"  This dress is a marriage of those feelings.  The funky print reminds me that I actually do get into a groove and enjoy this time (at least for a while), while the comfy fabric and design don't confine me.  Also, the long length means I don't have to bother with shaving my legs if I don't want to.  It's a fabulous care-free style.
Ever heard of Resting B*tch Face?  In all these pictures I seem to have Purposeful B*tch Face.  I swear I'm much nicer than I look in these pics.

The tilt on all the pictures?  It's...artistic.  Yeah, artistic.
The pattern is Simplicity 1469.  It's their version of the Megan Nielsen pattern.  I'm cheap and like to know what to expect from my patterns, so I was happy to see this in the Simplicity catalog.  It sewed up fast and easy.  I did have to take in a few inches through the center back to get the proper fit and to narrow the neckline a bit, but other than that it was wonderful.  It was easy to lengthen the pattern to a maxi dress so I could avoid that whole leg-shaving issue I just mentioned.
Now that I see this picture I realize I should have also raised the shoulders in the front.  Yay for the saggy boob look!
The fabric I used is the hot pink black zebra print from Girl Charlee, as well as some leftover black interlock I had on hand.  I think I may live in this dress  It is ridiculously comfortable and all I have to do is add a pair of earrings to make a complete outfit.  An added bonus is that the pattern is made to allow nursing access.  I guess my fear of making something I'll only wear for the next few months was unfounded.  Well, at least for this pattern.  I'm pretty sure I'll be making another one as a shirt so I have more nursing attire.

Unnecessary parting note:  I seem to have blogging picture problems recently.  There are the pictures on this post (I'm the leaning tower of Jordan!) and then all the missing pictures from the past several months.  I'm still figuring out my first smart phone.  Pictures that I thought I was deleting from the phone ended up deleting from everywhere so all the pictures I have of work I've done since September are now gone forever. Sniff.  At least I didn't delete the clothes and they're all still in my closet.

Friday, February 28, 2014

Zebra Jacket

This is what it looks like when you take pictures of the project you just finished at 10:30 pm...after a full day of your toddler son refusing to be anywhere but in your arms or on your lap.  It's a good thing Q-ball is so cute.  But I was talking about the jacket.
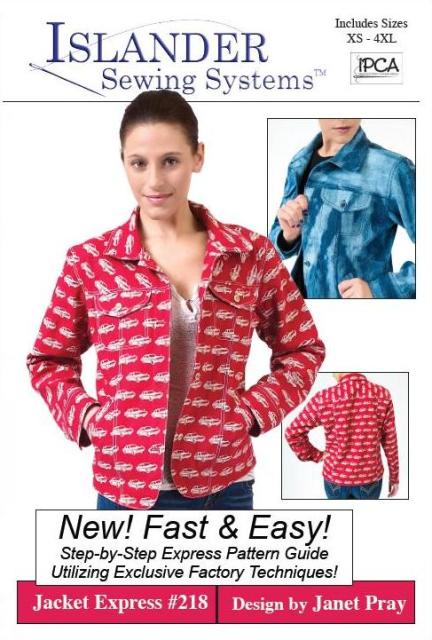
via sewing.patternreview.com
The pattern is Jacket Express #218 by Islander Sewing Systems.  It came with my purchase of the Craftsy class Sew Better, Sew Faster.  I can be a bit of a snob about what I think an online class can teach me about sewing but I was intrigued by the promise that the entire jacket could be sewn quickly and without any pins.  As the class was on sale for $20, I went for it.  The class includes the jacket, which usually costs $22.95, so I felt like I was getting a good deal.
It was late when we took this picture, thus the entire lack of styling.
I changed the pattern by squaring off everything but the pockets.  I was interested to try the crimping technique to give the round shape to the pockets so I kept that.  My fabric is a cotton blend of some sort I picked up at Hancock specifically to make the jacket.  The pattern is different from any others that I've used before.  The instructions are in a full color booklet and the order of construction is very different for most commercial patterns.  It's organized to be as efficient as possible.  That's great if the fit is already accurate.  Mine is a bit big in the back shoulders but not enough for me to pick it out and redo it.  I couldn't have known that until I was far into the sewing process.
This is as sassy as I get at the end of the day.
Construction was fairly easy, just time consuming because of all the pieces and all the topstitching.  I really did get most of the jacket sewn without using pins.  Even the sleeves were pin-less and that's something I'd never done before.  There are a few techniques that get a bit tricky to explain in writing and I had to figure those out for myself.  I have not yet watched the whole video on Craftsy because I needed to save time.  I'm sure she's got other tips for the tricky parts which are not included in the written pattern.
Welt pockets. I haven't done real welts in years.
I'll probably make this pattern up in the future with the necessary fitting modifications.  For now this is a great little number while Mother Nature decides whether or not it should be spring around here. She's a fickle mistress in March and April.  It's not uncommon to switch between heat and A/C in the car several times a day during these months.
What? Oh, you're taking the picture now?
I think I really need to watch the class video and see what other tips are there.  I wasn't a fan of trying to topstitch the facing and upper pockets without being able to see them, particularly without the aid of pins.  So I didn't.  Hopefully there's more info on that with the video.  I'll actually take the time to watch it before I make the next one.

Linking up:

Building a Better Wardrobe Giveaway

Tuesday, February 25, 2014

What's Black and White and Red(dish Orange) All Over?

I'll give you a hint...it's not a newspaper.  Remember that elementary school joke?  Anyway.  This is my signature style for Project Sewn.  I'm still figuring out exactly what my signature style is.  It's been evolving since I started Dressing Your Truth (not an affiliate link, but I get a reward) six weeks ago.  What I do know and have always known is that I like to dress my own version of comfy casual. My definition of comfy is great fit, distinctive/bold, and classy.  I also need to be able to chase my children.  I'm not a fan of plain t-shirts (on me), even for every day.  I like to feel put-together, but not overdressed for a stop at Walmart.  I'm going to keep the rest of this short and sweet because there's looooooots of stuff to say after making an entire outfit and I'll probably do a full post about each piece.
The Coat
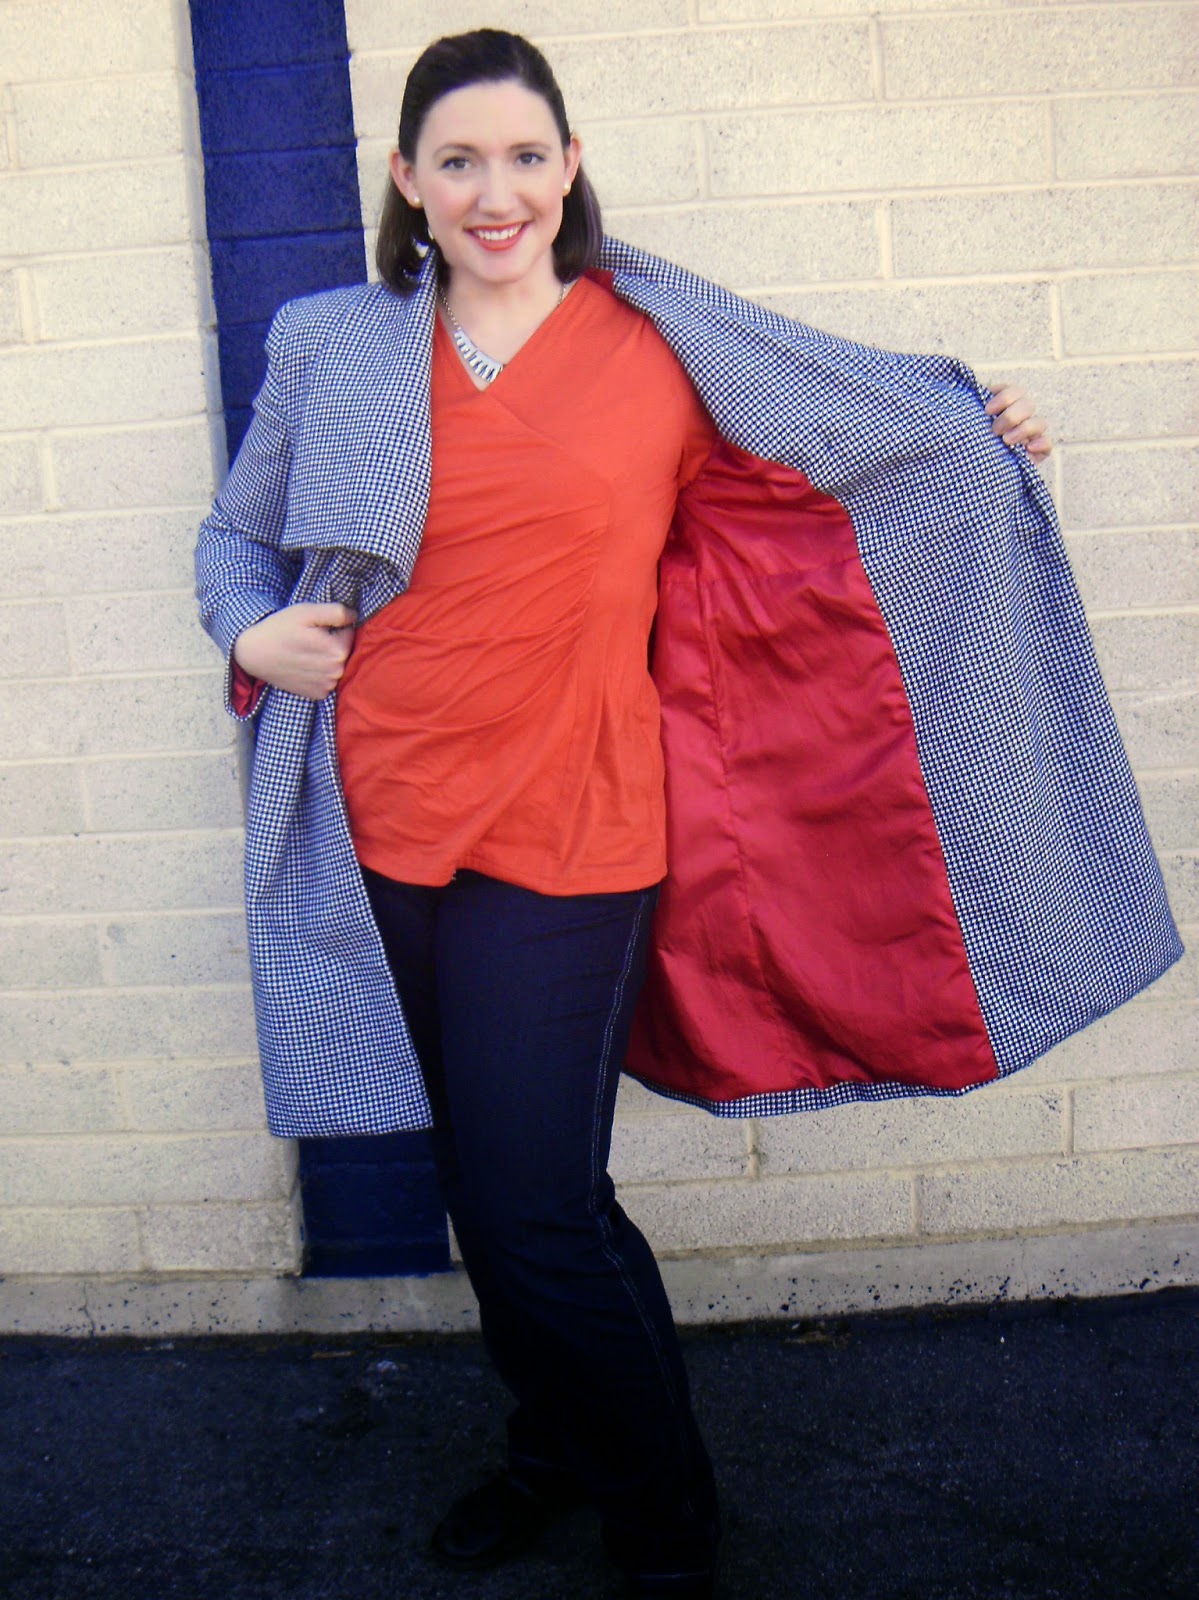
I've had the pattern and fabric for the coat for over a year.  Houndstooth is one of my favorite patterns. The wool is fairly thin so it also works well for days that aren't the dead of winter.  It was originally to be a weight loss reward last winter, but that didn't work out.  Then I was a little disappointed that I couldn't make it for this winter because I was going to be too pregnant.  That didn't work out either and I decided I deserved to have the coat regardless of weight loss.  I totally love the collar.  That top flap usually lies in a straight line but you know how it is when you try to take pictures...

The pattern is Butterick 5685.  Not so bad as patterns go, but there are a couple of changes I would make.  I'll go over that in another post.  I chose red for the lining because...well, why wouldn't I?  I stuck to the pattern pretty closely

The Top
The level of excitement I felt when I found the right color of orange fabric was almost indecent.  Until Dressing Your Truth I never would have worn orange.  I thought I couldn't pull it off.  Look at me now, pulling it off and being fabulous about it.  :)  The pattern is McCall's 6513.  I had to raise the shoulders, reset the sleeves and play around with the crossover bits on the front to achieve the right fit.  I changed the sleeve length simply because I like them better as 3/4 sleeves.
Bathroom selfie!
The Jeans
Yay jeans!  I have a weirdo lower body.  I've come to grips with it.  Really, once you have pants that fit properly it's easy to appreciate what you're born with.  The jeans pattern is McCall's 6610.  I did some heavy altering thanks to the Sewing Designer Jeans class on Craftsy.  By "heavy altering" I mean I shortened the rise, changed the waistband from straight to modified contour, slimmed the leg, made a front crotch adjustment, and changed the shape of the front pocket.  Easy cheesy, right?  Suuuure...

There's my bum in well-fitting jeans
To add contrast I used two strands of metallic silver thread for the topstitching.  I love all things sparkly, so I added some bling to the pockets.  I used a pre-made rhinestone design to begin with, then extended the design with more loose stones because my butt needed more shine.  Obviously.
There's a close up of my bum in well-fitting jeans
There were a couple of other fun touches I added.  The pocket bags came from scraps of a tropical print I used for who-knows-what.  I can't even remember except that I used some for the Origami Butterfly Wreath.


As another unique touch I squared out the stitching on the fly rather than use the half oval.  I also squared off the pockets.  To secure the fly facing I made three rows of bar tacks and repeated that design in other places where rivets would generally be used.  It all ties in pretty well, I think.
So there you have it, my signature style.  The fit is so perfect I feel like I melt into it.  The color is bold and the design is simple, but distinctive.I could go almost anywhere in my daily routine while wearing this get-up and feel perfectly comfortable.  I'm calling it a win.

Linking up:
Building a Better Wardrobe Giveaway

Monday, February 17, 2014

The Polka Dot Boring-er (Plus Dr. Who Geekery)

Any Dr. Who fans out there?  If you are then you'll get the "boring-er" reference.  If not, there's a little video at the bottom.  It doesn't necessarily explain much, but it does include the blue boringers.  Anyway.  My contribution to this week's Project Sewn sew-along has as much to do with my favorite Gallifreyan as it does with the shoes that inspired it.  The idea behind this week's theme of "If the shoe fits" is to choose a pair of shoes and make something to go with them.  I was a little disappointed because all my shoes are boring.  Like really, seriously boring.  Ultimately I ended up choosing these shoes:
They're old and dirty and they used to be gold.  I spray painted them a couple of weeks ago to breathe some new life into them.  That's when inspiration struck.  Rather than make something brand new to go with my boring old shoes, I could remake something old and boring into something new and fun.  I went with my once-beloved-but-now-meh polka dot dress.
The dress is too big and really long and just...boring.  Boooooooring.  Boring.  I used to like it a whole lot better but times have changed and I've moved on.  Until fixing the dress for this challenge, the only thing I could stand to do to make the dress wearable was to put my bright pink cardigan with it.
Much better, but still uninspiring
I love the polka dot pattern.  And that's all.  Time to refashion!  Yay!
This picture makes it look much longer in the front, but it's not.
The list of alterations is as follows: shorten skirt, take in bodice sides and reset the bottom of the sleeves (I'm always grateful for my background in alterations when I need to do that), cut and bind new neckline, add white fill in piece, switch out buttons, make ties into belt carriers, and pleat the front waist of the skirt.  Whoo, that was a lot!  After taking in the sides I replaced the skirt by matching the center backs on bodice and skirt.  I continued pinning them together as usual until I got to the skirt sides seams.  Those were several inches into the bodice front, as I had taken in about 5 inches on the sides seams, as well as using skirt fabric measured up from the original hem (which was wavy and I never noticed when it was around my ankles) rather than down from the waist.  The skirt had a slight a-line, which gave it extra fullness once I got it up to the empire waist.  After pinning to the side seams I matched the center fronts of bodice and skirt and then added pleats to the front skirt to keep the fullness and add interest.  After I cut the neckline down I needed to add the panel for modesty's sake (hello, world, meet my bra!) and personal comfort.  I originally made a different fill-in piece from leftover skirt fabric with pleating and binding to mimic the design on the rest of the shirt.  Once the fill-in was in place it ended up looking like an afterthought rather than an intended part of the design.  But I like the white inset quite a bit.  And I like not flashing people.
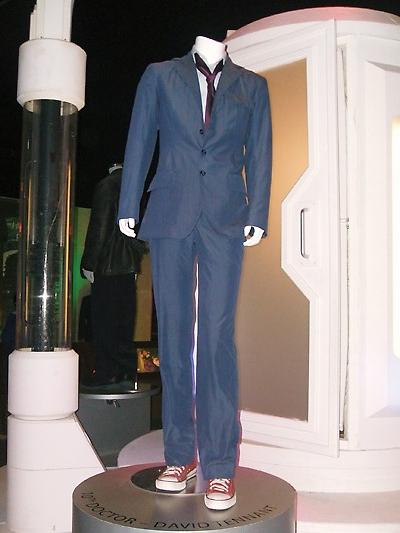
Warning: here's the part where I get my geek on.  I wore the red jeans (also self-made) as a tribute to the 10th Doctor's shoes.  He's my favorite by far, including his costume.  The combination of suit and Converse shoes makes me smile.  That's also why I added the pearls to my outfit--it makes the look both dressy(er) and casual.  And he has really great hair.  It's all sticky-uppy.
source  
My silver shoes are the same style as the 10th Doctor wears, just the wrong color.  In addition to the red pants, I also added a sash in what is surely the Doctor's favorite color.  "Hello, sexy."
A belt in TARDIS blue.  My waist is bigger on the inside.  ;)
The buttons have a black background with silver dots.  All of time and space on the front of my shirt.  I suppose I could say the same about the polka dots.

I don't have a sonic screwdriver so a Phillips head will have to do.
And we can't forget a nod to the 11th Doctor.  It took me a while to warm up to him.  10 was a hard act to follow.  I totally would have run away with him.  Or maybe I'm another Donna (also my favorite) and I just can't remember.
I don't have a fez but I DO have my son's bow tie.
 And here's that blue boringers video, featuring the 11th Doctor.  Enjoy.


Linking up:
Building a Better Wardrobe Giveaway