
Supplies:
Red and white striped ribbon (5/8" wide)
Blue polka dot ribbon (5/8" wide)
Silver ribbon (1/2" wide--optional)
Glue gun
Hair clip of choice
I just picked up ribbon when I was out at the store so I have a LOT of extra. If you can buy it by the inch it's even more economical. The stuff I bought was Offray brand. The silver ribbon was leftover from another Fourth of July project and was also Offray ribbon.
Cut the blue ribbon 1-1/2" long. Make sure to seal the edges with heat or Fray Check. I prefer to heat seal with a lighter. The edges shrink a little but it feels more secure.

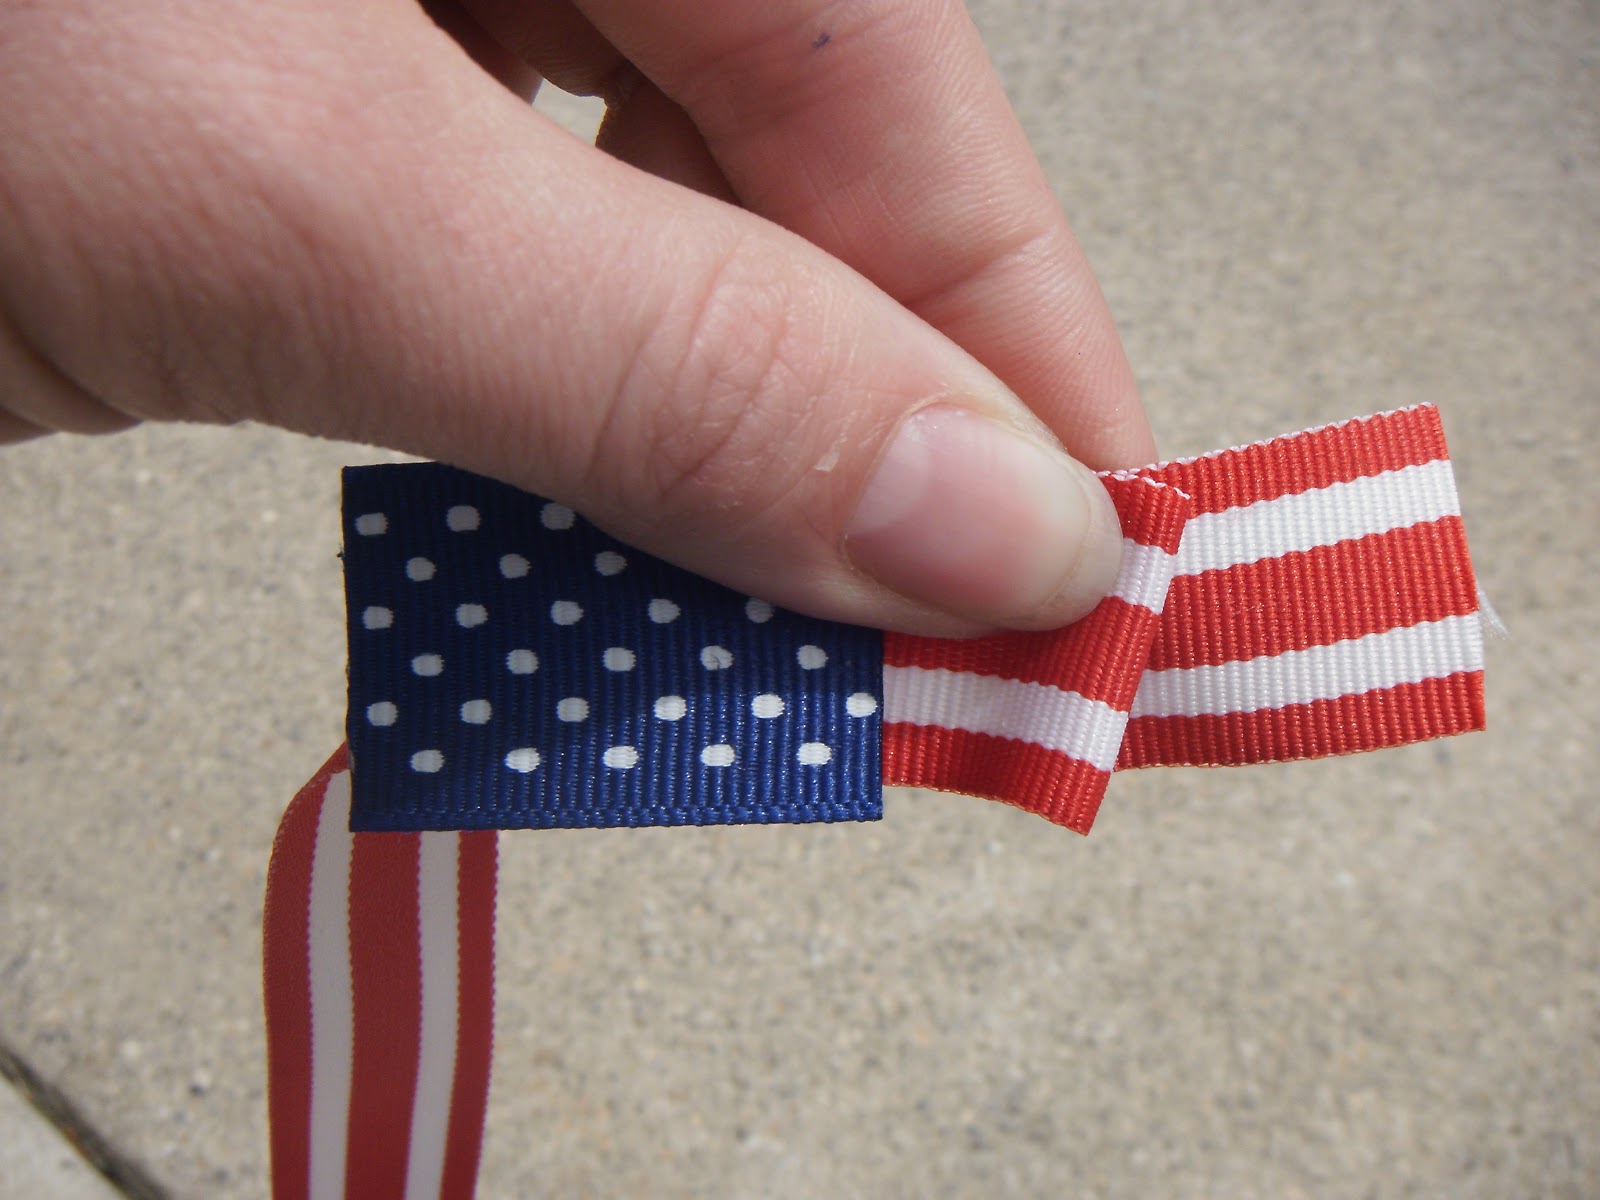


From here you can choose where you want your flag to flutter. Glue the ribbon onto itself on both sides to secure. I also left one without the flutter to see if I preferred that. I cut the ribbon a bit shorter until it was a length I liked better. I ended up "fluttering" it, anyway. The difference can be seen in the picture at the top.

To make the flag pole I simply cut 3 inches of ribbon and folded it in half. Then I sandwiched the flag between the layers. One trick that worked for me was to glue a dot at the top and at the bottom to help hold it in place while sandwiching the flag. Glue both sides of the ribbon to hold it down. Another option for the pole would be to use the reverse side of dotted ribbon and glue that on.
To finish off the bow, glue on your favorite hair clip. I happened to have a french clip available at the time. That's what is modeled below. I can't wait for my girls to wear theirs this summer! Total cost for the project was under $8. I'll have enough ribbon to make two for Blue Eyes, one each for Pink Blur and my niece, and I may even make one for myself.

No comments:
Post a Comment